Mumble setup: Difference between revisions
mNo edit summary |
mNo edit summary |
||
| Line 15: | Line 15: | ||
[[File:mumble_02new.png]] | [[File:mumble_02new.png]] | ||
The important boxes are Address | The important boxes are Address and Username (put here whatever you like). The port number should be given automatically. | ||
Then you connect to the server and go to the settings. | Then you connect to the server and go to the settings. | ||
Revision as of 16:01, 9 January 2018
(This is a setup guide for computer users. If you have an Android smartphone, you can try using Plumble – a mumble port which is easy to set up. You can get it on F-Droid or Play store (free version).)
Mumble is a simple tool but it's a bit tricky to set it up for the first time. Here is a step-by-step guide for setting up mumble.
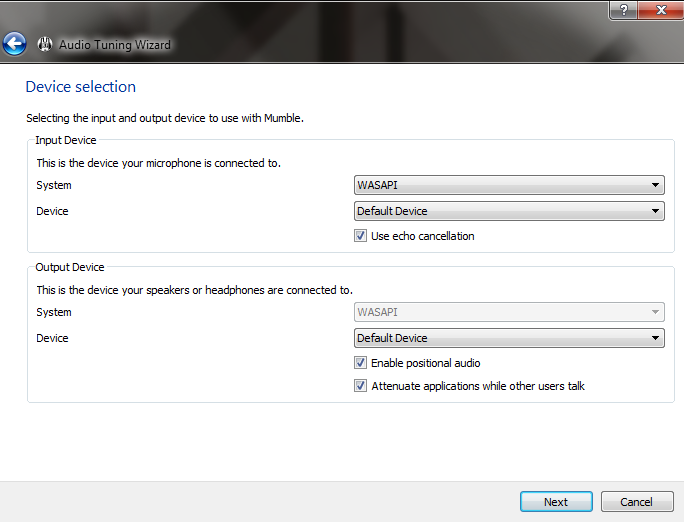
First you set up the audio settings. The bars with the volume look a bit confusing and echoes make a lot of noise, but if you read carefully through the texts, it's not so complicated in the end.
In the first window it should be like in the picture above.
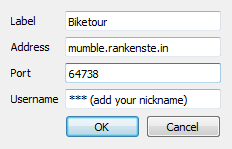
After you are done with the audio settings, you need to connect to the private biketour server.
The important boxes are Address and Username (put here whatever you like). The port number should be given automatically.
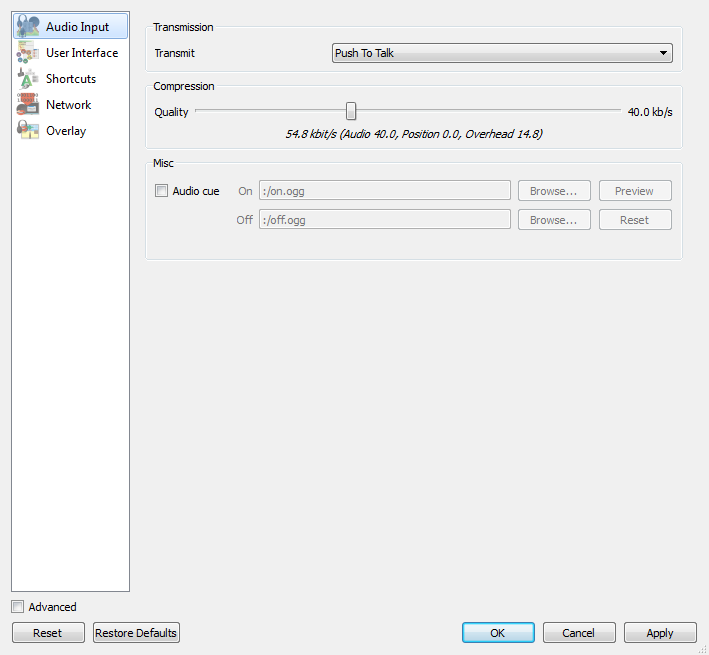
Then you connect to the server and go to the settings.
When using mumble it is best to wear headphones, so that there are no echoes created while other users talk (due to your microphone getting a delayed feedback from your speakers).
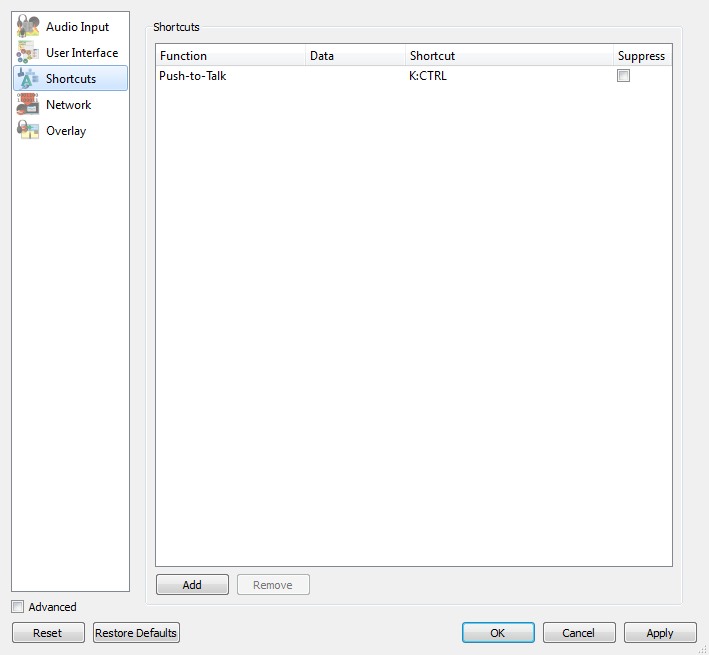
Another way to get rid of echoes is to assign a shortcut to a key on your keyboard in the Shortcuts tab for Push to Talk (you can use for example the left control key). After this your microphone will be listening only when you push and hold the key you assigned to it.
Now you should be ready to use Mumble!


